Oiling Out

Oiling out is a technique used to even the sheen on a completed oil painting.  When observing your finished oil painting you might see areas that are more glossy than others, or more matte than others.  This is due to differing absorption rates of the oil.  This makes the painting look uneven in terms of its sheen.  The only way to rectify this is by oiling out – varnishing won’t do the trick.

To oil out, take a lint-free cloth and some artist’s painting medium.  Making sure your oil painting is dry to the touch, apply in circular motion until an even finish is achieved.  After your painting dries for at least six months, it is safe to varnish.

Fat Over Lean

When painting in oils, one must adhere to the principle of “fat over lean” to prevent cracking.  I think fat over lean might be better understood if considered as ‘flexible over less flexible’. One should therefore apply paint with a higher oil to pigment ratio (‘fat’) over paint with a lower oil to pigment ratio (‘lean’) to ensure a stable paint film, since paint with the higher oil content remains more flexible.  When painting in layers, the proportion of medium used in each layer should be increased. The higher proportion of medium makes subsequent layers more flexible and prevents the painting from cracking. One should therefore add more and more oil to the amount of solvent used. 

Oil paint dries at varying rates due to the differing siccative properties of pigments. However, everything else being equal, the higher the oil to pigment ratio, the longer the oil binder will take to oxidize, and the more flexible the paint film will be. Conversely, the lower the oil content, the faster the paint dries, and the more brittle it will be. Ignoring this practice, even in some alla prima painting, may result in a cracked and less durable paint film.

This applies to classical painting media such as turpentine, natural resins, and certain plant oils (linseed, walnut and poppy).  When applied properly, these will last for centuries.  

Flemish Technique

The Flemish Technique, practiced by master painters in 15th-17th century Flanders builds great depth of color, ensures a full value range, and helps with accuracy in realism. I recently documented a painting of pansies that I did in the Flemmish Technique. I really enjoy this technique as it breaks everything down to manageable steps and builds such rich depth in the painting that you just can’t seem to get with a direct painting method. It is very interesting that paintings done in the Rennaisance will outlast any done afterward. They just get more beautiful and transparent with age. Museums spend a lot of money trying to care for more modern collections in which the artists didn’t understand the chemistry, materials or techniques behind good works of art.

IMG_0107

The Drawing on Canvas Panel – use charcoal, or pencil and either “fix” the drawing with fixative or ink with india ink and brush. The time invested on a great drawing is well spent as it is the bones of your painting.

IMG_0075

The Imprimatura – allows increased ability to judge values in the next layer. Contrast between a white canvas and applied values may make you judge them darker than they really are.

IMG_0079

Applying the umber layer. The goal of this layer is to establish value and some detail.

IMG_0083

The Dead Layer, or Grisaille. Prepareat least 5 shades of grey. The purpose of this layer is to establish the modeling of your painting. You should spend most of your time on this layer. If you do, the subsequent color layers will go as smoothly as “butta” (butter).

IMG_0152

The Color Layers. Since you have isolated all the other steps to concentrate only on the issues at hand, color is now the icing on the cake. Build up layers of color glazing. Transparent layers will give you more of an illusion of depth and richer, more vibrant colors. Keep the shadows transparent. Use heavier impasto in the light and on highlights especially.


Reading Museum and Town Hall

The Reading Museum and Town Hall is a fine example of Victorian gothic architecture, it is here that we came to see the replica of the Bayeux Tapestry.  The original Bayeux Tapestry is preserved and displayed in Bayeux, in Normandy, France. Nothing is known for certain about the tapestry’s origins. The first written record of the Bayeux Tapestry is in 1476 when it was recorded in the cathedral treasury at Bayeux as “a very long and narrow hanging on which are embroidered figures and inscriptions comprising a representation of the conquest of England”.

The Bayeux Tapestry was probably commissioned in the 1070s by Bishop Odo of Bayeux, half-brother of William the Conqueror. It is over 70 metres long and although it is called a tapestry it is in fact an embroidery, stitched not woven in woolen yarn on linen. Some historians argue that it was embroidered in Kent, England. 

It was the idea of Elizabeth Wardle to make the replica Bayeux Tapestry, now on display in Reading Museum. She was a skilled embroiderer and a member of the Leek Embroidery Society in Staffordshire. Her husband, Thomas Wardle was a leading silk industrialist. Elizabeth Wardle researched the Bayeux Tapestry by visiting Bayeux in 1885. The Society also based the replica on hand-colored photographs of the tapestry held by the South Kensington Museum, now called the Victoria and Albert Museum, London. The aim of the project was to make a full-sized and accurate replica of the Bayeux Tapestry “so that England should have a copy of its own”.

Thirty-five women members of the Leek Embroidery Society worked under Elizabeth Wardle’s direction. This ambitious project was completed in just over a year. As well as members from Leek, women from Derbyshire, Birmingham, Macclesfield and London took part. Each embroiderer stitched her name beneath her completed panel.

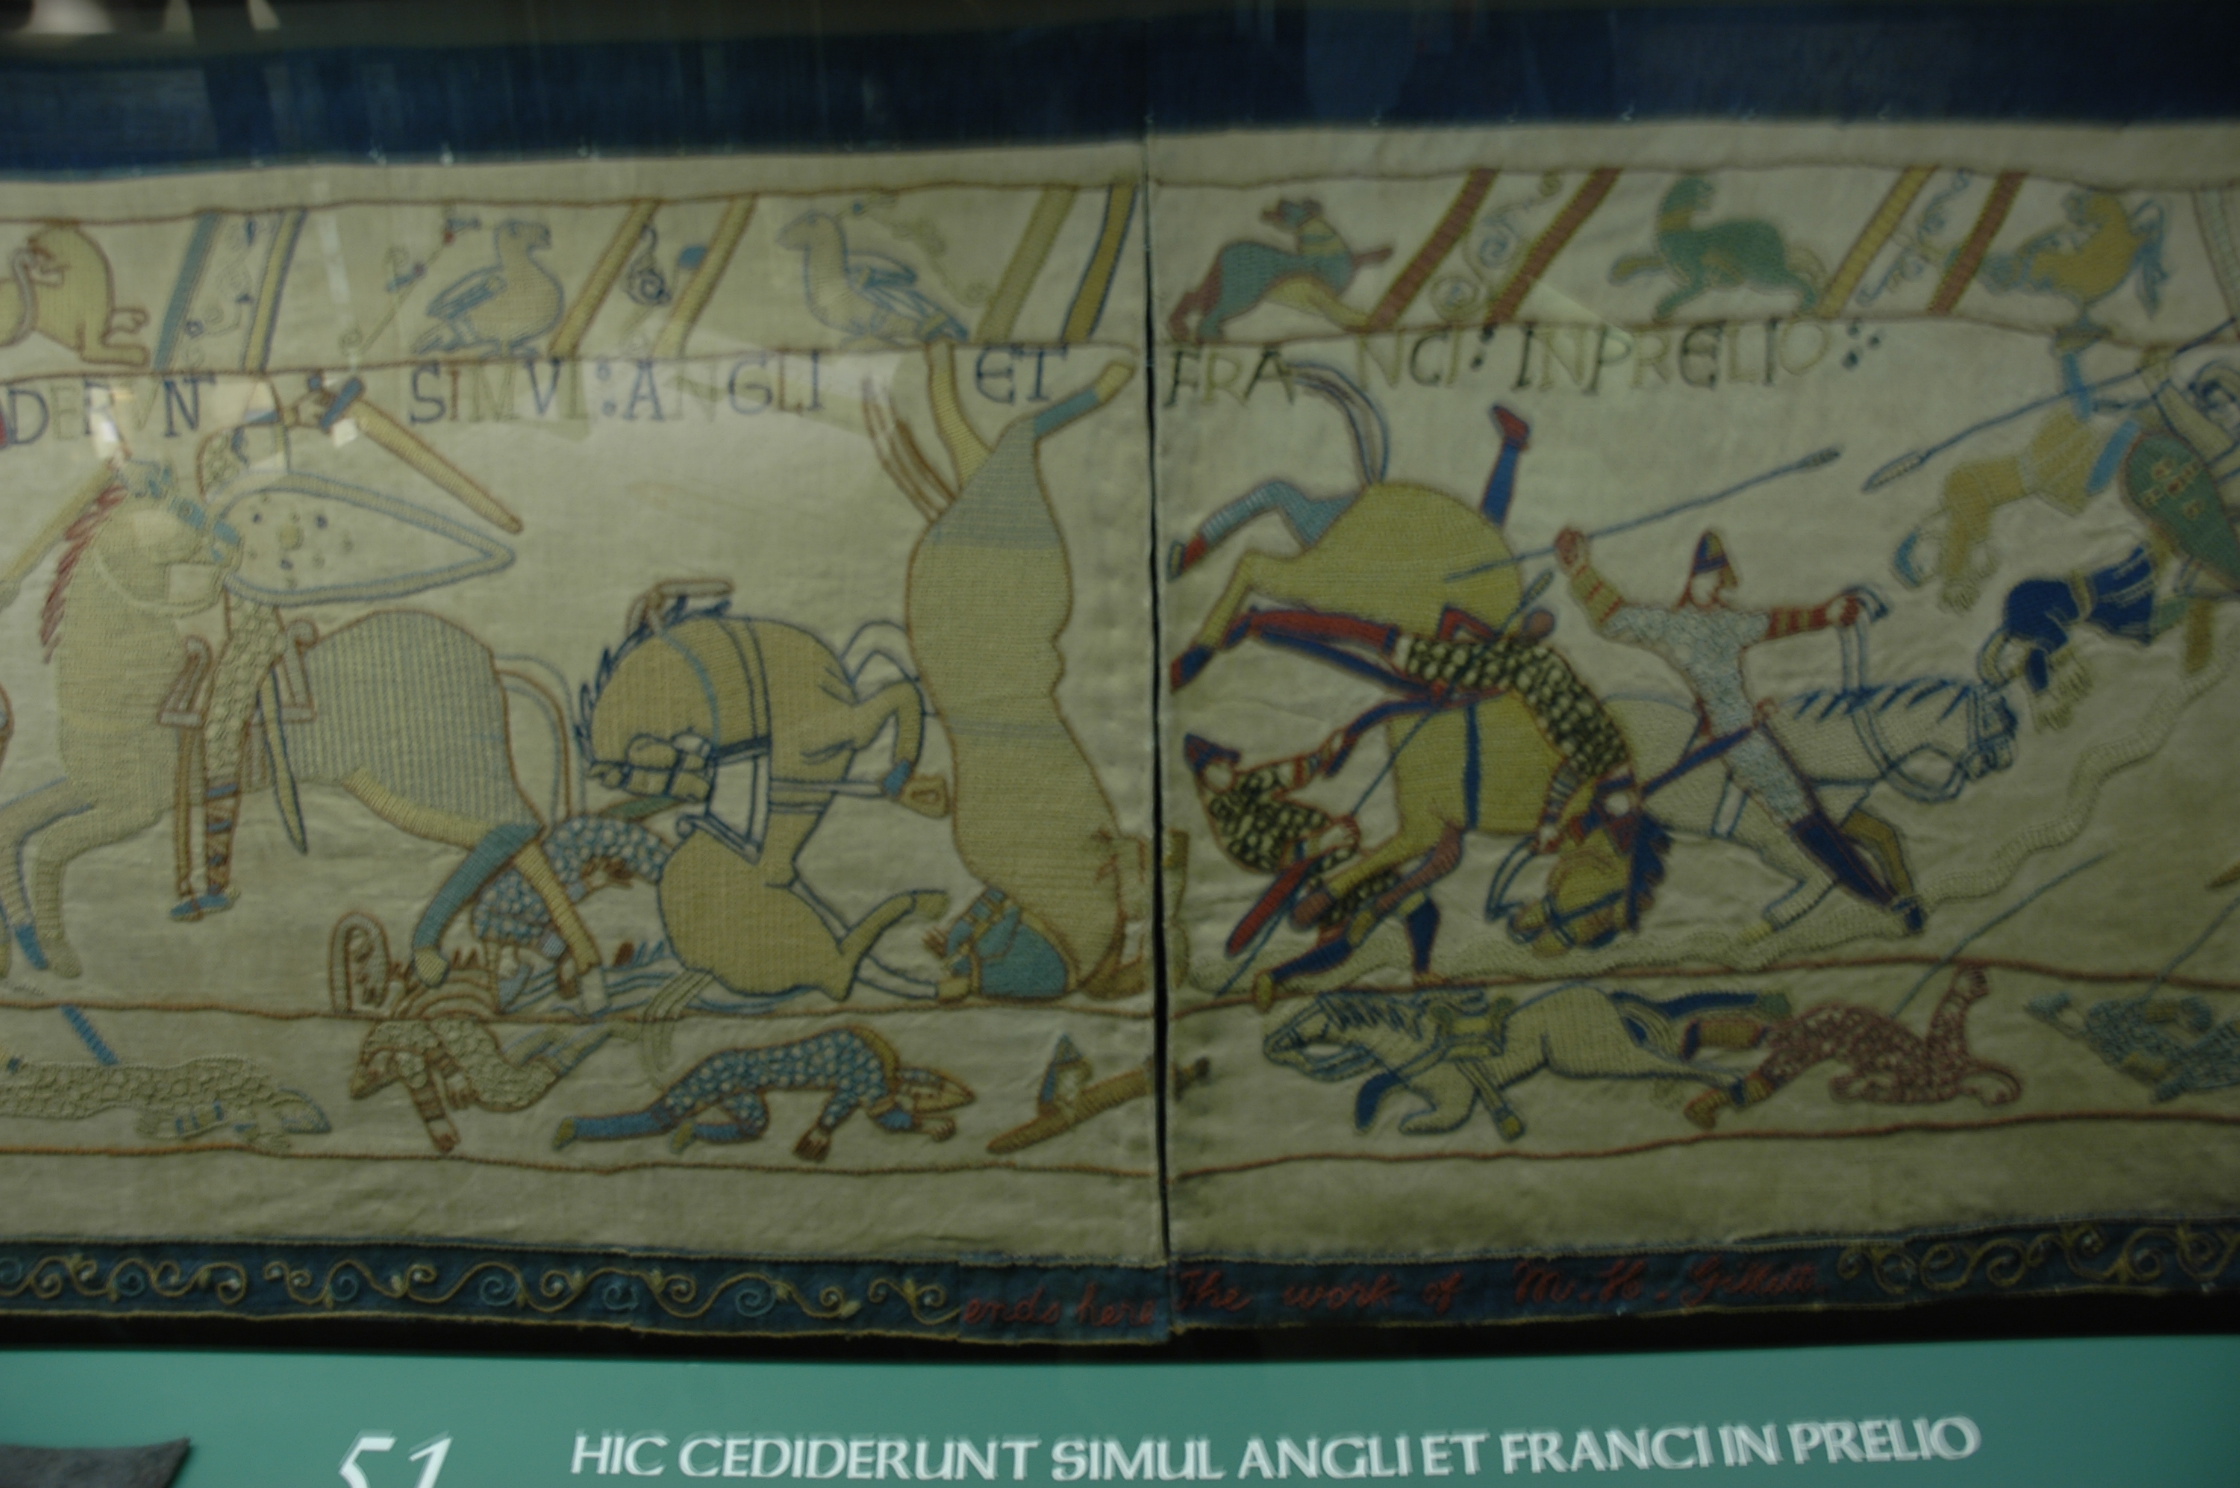
The tale told by the Bayeux Tapestry is the story of William the Conqueror and Harold, Earl of Wessex, the men who led the Norman and Saxon armies in 1066. William’s defeat of Harold at the Battle of Hastings ensured the success of the Norman invasion of England.

DSC_0038

Replica of Bayeux Tapestry

RHS Lindley Library, London

The Royal Horticultural Society’s Lindley Library in Londonspecializes in botanical art and garden history, holding unique collections of early printed books on gardening, botanical
art and photographs. It also holds the archives of the RHS and personal archives of notable gardeners and garden designers.

The library is based upon the book collection of English botanist John Lindley, and has many rare books dating from 1514. It also includes other media such as garden guidebooks, trade catalogues, postcards and press cuttings. As well as horticulture, the collection covers flora, birds and other related subjects. The Lindley Library is the largest horticultural library in the world.

Elizabeth Koper gave us a delightful tour which included works by Ehret, 16th century illustrated books, contemporary botanical artworks by accomplished artistssuch as Fiona Strickland, and royal signature pages. She also spoke about the application process for the annual RHS botanical art show.


Lindley


DSC_0012 DSC_0014